How to Safely Hide Your Propane Tank
We get it. Despite the many benefits of using propane to fuel your home, having an aboveground tank in your yard may not be aesthetically pleasing. Maybe you can see it out the window when you’re doing dishes at the kitchen sink. Or maybe it’s on the side of your home and you can see it every night when you return from work.
No matter where your aboveground propane tank is located, many people just don’t like looking at it. And because propane tanks should be painted light, reflective colors to help keep the tank cool, you can’t even really change the color to blend in with your landscaping. The good news is that there are ways you can safely hide your propane tank while still allowing our drivers and service technicians to access it when needed. Read on for some tips from influencer Maggie McGaugh. You can find her on Instagram, @MaggieMcGaugh. Maggie specializes in fun DIY projects to spruce up and organize your home, so it looks less cluttered and more put together.
The Challenge
We recently challenged Maggie to find a unique, safe way to hide an aboveground propane tank. She was the perfect person for the job because she’s a proud Ferrellgas propane user herself! Maggie got right to work considering her options.
Safety is at the Heart of Everything We Do
First and foremost – safety. Maggie takes safety seriously, just like we do at Ferrellgas. It is at the heart of everything we do. We want to treat your family like we’d treat our own families. Our dedicated team of professionals are constantly reviewing and updating guidelines to make sure our customers and our employee-owners are safe.
Those safety guidelines come into play when it comes to the area around your propane tank. It’s important to make sure the 10 feet surrounding your aboveground tank is clear of any structures, brush, grass, leaves, tree limbs, and other debris. The reason? Those types of materials are combustible. You don’t want anything near your tank that could fuel a fire.
You also don’t want to fully enclose your propane tank with a structure or fence. Our drivers and service technicians need easy access to your tank so they can do their job.

The Plan
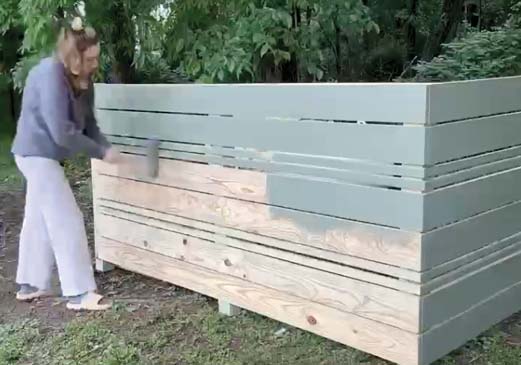
Keeping our safety guidelines in mind, Maggie came up with a great way to hide the propane tank in her yard. She started with a quick trip to the hardware store to pick up some lumber, nails, screws, and outdoor paint. She built a simple frame, then attached some additional boards to it to make a privacy fence. The key – it’s only two-sided. Once the fence was secured, she gave it a good coat of greyish green paint and voila! No more visible propane tank. You can watch Maggie’s entire video on how she hid her propane tank here.
Key Tips
There are some key takeaways from Maggie’s process. First, she only built her privacy fence on two sides of her propane tank – the sides she could easily see from her home and her yard. She left the other two sides open so our employees could easily access her propane tank for fills and maintenance.
Secondly, Maggie built her privacy fence a minimum of 10 feet away from her tank. That leaves a clear perimeter around the tank for safety purposes. She still gets the coverage she needs so she doesn’t have to stare at her propane tank anymore, and she did it safely.
Make Your Fence Your Own!
Maybe you prefer the classic, neutral aesthetic that Maggie’s fence provides. But don’t be afraid to show your creativity! There is no reason why you can’t paint your privacy fence to match your landscape so propane tank blend in even more.
Or you can try a fun design like sunflowers or stripes. You could even get your family involved! Let the kids paint their names, add handprints, or splatter paint on the fence. You’ll have a keepsake for years to come. Good luck, and have fun with this great, practical DIY project!
CATEGORIES
Archives
- Summer 2025
- Spring 2025
- Winter 2024
- Fall 2024
- Summer 2024
- Spring 2024
- Winter 2023
- Fall 2023
- Summer 2023
- Spring 2023
- Winter 2022
- Fall 2022
- Summer 2022
- Spring 2022
- Winter 2021
- Fall 2021
- Summer 2021
- Spring 2021
- Winter 2020
- Fall 2020
- Summer 2020
- Spring 2020
- Winter 2019
- Fall 2019
- Summer 2019
- Spring 2019
- Winter 2018
- Fall 2018
- Summer 2018
- Spring 2018
- Winter 2017
